
This blogpost documents the addition of a full custom water loop and two GTX 2080 Ti GPUs to my previous build. This work was done back in November/December of 2019 but didn’t get around to doing the write up until now.
Without further ado, here is the completed machine in full RGB glory:


Unless you’re interested in detailed part lists and rants about overpriced cloud providers, feel free to scroll down until you start seeing pictures again.
All parts from the original build. There’s now improved versions of the Threadripper CPUs and we might soon get the next generation of Nvidia GPUs as well.
| Component | Quantity | Product Name | Vendor | Subtotal |
| CPU | 1 | AMD Ryzen Threadripper 2990WX | Amazon | $1,679.4 |
| GPU | 1 | GIGABYTE GeForce RTX 2080 Ti GAMING OC | Newegg | $1,199.99 |
| GPU | 1 | GIGABYTE GeForce RTX 2080 Ti GAMING OC | Amazon | $1,199.99 |
| Motherboard | 1 | ASRock X399 Taichi | Newegg | $269.99 |
| Case | 1 | Cooler Master C700M | Amazon | $469.99 |
| Memory | 4 | 16GB Crucial ECC DDR4 2666 CT16G4WFD8266 | Newegg | $491.96 |
| PSU | 1 | EVGA Supernova 1600 T2 80+ Titanium | Amazon | $449.07 |
| Disk | 1 | 1TB NVMe Samsung 970 EVO Plus | Amazon | $247.82 |
| CPU Cooler | 1 | Noctua NH-U12S TR4-SP3 | Amazon | $69.90 |
| Sales Tax | 1 | $523.14 | ||
| Grand Total | $6601.25 |
I ordered most of the parts for the water loop directly from EK Water Blocks in Slovenia. Their custom loop configurator was super helpful for figuring out all the parts I would need.
| Component | Quantity | Product Name | Subtotal |
| Monoblock | 1 | EK-FB ASRock X399 RGB Monoblock – Nickel | $149.99 |
| GPU Waterblock | 4 | EK-FC RTX 2080 +Ti Classic RGB – Nickel + Plexi | $480.24 |
| Radiator | 1 | EK-CoolStream SE 420 (Slim Triple) | $89.99 |
| Radiator | 1 | EK-CoolStream SE 360 (Slim Triple) | $74.99 |
| Radiator | 1 | EK-CoolStream SE 240 (Slim Dual) | $59.99 |
| Fan | 5 | EK-Vardar EVO 120S BB (700-1150rpm) | $62.95 |
| Fan | 3 | EK-Vardar EVO 140ER Black BB (500-2000rpm) | $68.91 |
| Fan Cabling | 2 | EK-Cable Y-Splitter 3-Fan PWM (10cm) | $7.98 |
| Fan Cabling | 1 | EK-Cable Y-Splitter 2-Fan PWM (10cm) | $3.49 |
| Pump | 1 | EK-XRES 100 Revo D5 PWM (incl. pump) | $154.99 |
| Terminal | 1 | EK-Scalar Quad 2-slot – Plexi | $59.99 |
| Tubing | 1 | EK-DuraClear 9,5/12,7mm 3M RETAIL | $14.99 |
| Fittings | 12 | EK-Torque STC-10/13 – Black | $83.88 |
| Cooling Fluid | 5 | EK-CryoFuel Solid Azure Blue (Conc. 250mL) | $74.95 |
| Misc | 1 | EK-ATX Bridging Plug (24 pin) | $2.49 |
| Misc | 1 | EK PROMOTIONAL BADGE | $0.01 |
| Shipping | 1 | DHL Express | $103.87 |
| Surprise Import Tax | 1 | US Import Tax | $109.09 |
| Grand Total | $1602.79 |
The two GPUs and some additional water loop parts that I missed in my original EK order and wanted fast shipping on came Amazon and Newegg.
| Component | Quantity | Product Name | Vendor | Subtotal |
| GPU | 1 | EVGA GeForce RTX 2080 Ti Black Edition Gaming | Amazon | $1,222.12 |
| GPU | 1 | EVGA GeForce RTX 2080 Ti Black Edition Gaming | Newegg | $1,246.67 |
| GPU Backplate | 4 | EKWB EK-Vector RTX Backplate, Nickel | Amazon | $238.64 |
| Fitting | 1 | EK-Torque Angled 45° – Nickel 2PK | Amazon | $21.69 |
| RGB Splitter Cable | 4 | 4 Pins black 6 Way Y Splitter for RGB 5050 3528 LED Light Strips, 1m rgb wire, 10x Male 4 Pin Plugs | Amazon | $8.67 |
| Grand Total | $2,737.79 |
All in all, the full build cost me $10,941.83 (not including additional money spent on avoidable mistakes my education), several weekends and a good amount of sanity.
I have been running deep reinforcement learning experiments on the machine for about 6 months now for maybe 12 hours a day on average. I don’t actually pay for electricity, but at \$0.20/kWh power consumption might add another \$70/month or so to your bill. At the time of writing, an equivalent amount of capacity on GCP (n1-highcpu-32 and 4xV100) would set you back $3,631.10/month. V100s are maybe 30% faster than 2080Ti’s, though the 32 vCores (hyperthreads) will be a lot slower than the 32 physical Ryzen cores in my build. The simulation phase of my workload is actually bottlenecked on CPU and GCP doesn’t seem to allow using an instance type with more CPUs without also going up to 8 V100s, and working around this limitation by adding additional CPU machines adds a lot of system complexity. Either way, while not completely equivalent it’s a roughly comparable amount of compute. And after just 6 months of operation my costs are already 2x lower than what I would have paid on GCP. Pretty nice ROI! A large portion of the cost difference is accounted for by the truly ridiculous margins that Nvidia charges for their enterprise-grade GPUs, though I think GCP still extracts a healthy cut. I have not really researched this, but presumably there are baremetal hosting options that provide better pricing. In particular, the terms-of-service that Nvidia uses to prevent cloud providers from offering consumer-grade GPUs in the U.S. are not enforceable in the EU which allows for more competitive offerings.
I don’t expect to do another build for at least a year or so, but if I ever decide to spring for an upgrade one of the more sensible form factors would be something like a dual-socket server with 8 air cooled consumer grade GPUs. At that point the power requirements and noise/heat emissions make it impractical to have it standing around in your tiny SF studio apartment so I’d probably host it in a colo. I might consider outsourcing the assembly next time to save me some grief, I just now found Bizon Tech which actually looks like it has sensible configs with reasonable pricing, though sadly no AMD CPUs for the server form factor yet and an equivalent workstation to the one described here is still 50% more expensive.
Anyway, let’s assemble this beast! This was my first time building a custom water loop and most of my knowledge derived from the Ultimate beginners’ guide to PC water cooling.

All the parts I initially thought I would need, though the final build contains a few more.

EVGA GeForce RTX 2080 Ti Black Edition Gaming.

The first step is to remove the stock air cooler, which is attached by four screws. Also bonus shot of some Gloomhaven miniatures in background.

In addition to the cooling for the chip, there is a metal plate that provides passive cooling to some of the other components. We remove this as well.

It is attached by the smaller screws that go through the backplate.

Removing the passive cooling plate.

Grey thermal pads connect the components on the PCB to the passive cooling.

Stock thermal pads and thermal paste removed. Chip cleaned with 99% isopropyl alcohol. Shiny!

Placing the thermal pads that came with the EK waterblocks.

More thermal pads. These had to be cut into shape first.

After placing all remaining thermal pads and removing the blue plastic film covering.

Thermal grease.

Placing the waterblock.

I was just going to reuse the stock backplates, but at this point I realized that they were incompatible with my water block due to using different, smaller screws. So I had to order and wait for another 4 compatible EKWB backplates.

Removing the backplate.

There’s a whole bunch of thermal pads on the backplate as well.

Goodbye, thermal pads.
The whole process of preparing the graphics card took me about 3 hours the first time. By the fourth card, I had it down to about 45 minutes.

Two of my GPUs are GIGABYTE GeForce RTX 2080 Ti GAMING OC.

There’s a number of smaller differences on the PCB and cooling parts, but the process of replacing the stock cooler with my waterblocks was mostly the same.

Stockcooler removed.

Thermal pads placed.

I had to remove the bottom right screw for the waterblock to fit.

Gone.

Another pesky screw.

Removing the backplate. This one had much fewer thermal pads than the EVGA version.
At this point I’m still waiting on my backplates, but there’s plenty of other things to do.

Truly hideous air cooler that I was previously using for the CPU.

Removing the clip-on fan to get at the screws.

Graveyard of stock coolers. RIP.

First we remove the thermal paste.

The motherboard has a passive cooling element with two connected parts, one left of the CPU (with the X399 engraving) and one right above it. We want it gone to make place for the monoblock.

They’re attached via screws on the back.

And now they’re gone.

More thermal pads.

Thermal grease.

Back of the monoblock.

And here it is attached to the CPU!

Small passive cooler that goes on top of the two remaining motherboard components.

Fits nicely. We need to screw it on from the back though.

This is fine.

Success.

More screws for the monoblock.

The motherboard is ready. Time to take apart the case!

All the stock fans are replaced with radiators and better fans on top, front and bottom.

The metal part on the top will sandwich between the radiator and the fans.

Easier to assemble when not attached to the case.

Stock fans at the front.

They join the fallen.

That optical drive bay is taking up valuable radiator space.

And now it isn’t.

Time to assemble more powerful cooling.

Words.

I would have preferred to mount these fans in the opposite direction so they don’t blow hot air back into the case, but there’s not enough spacing it they end up hitting the radiator. Maybe I’ll get some standoffs at some point.
Fans need power.

Putting the frame back together.

One down, three to go.

EK-CoolStream SE 360 (Slim Triple)

The fans for this one work well in reverse-orientation as well.

It sits on the top.

Just one left.

More pesky drive bays taking up space.

Begone!

There are supposed to be two radiators here, but my huge PSU wouldn’t quite fit. Oh well ¯\_(ツ)_/¯

It’s not like any air would get through that bundle of power cables anyway.

This is the ideal studio apartment. You may not like it, but this is what peak performance looks like.

I had to drill some holes to mount the pump.

That’s better.

Et voilà!

The backplates arrive. At first I though I got screwed, or rather, did not get any screws, but it turns out they’re just attached in a small bag behind one of the openings.

Plenty of screws.

Thermal pads.

Candid shot of GPU’s exposed backside.

This was almost too easy!
Alas, the PCB of the two other GPUs are slightly larger than reference and the backplate doesn’t actually fit. Now this might have presented an obstacle to a lesser man, but I’m gangsta so I decided to just cut away part of the PCB.

Cutting didn’t really work, so I decided to bring out the files. Also N95 mask because glass fiber dust doesn’t sound healthy.

Better, but we’re still bumping up against the corner.

At this point we’ve hit the copper substrate. There’s a stupid number of really fine layers. I’m not at all worried though because I googled PCBs for 15 minutes which pretty much makes me an expert this is definitely fine.

I figured there wouldn’t actually be any connections running through a dead corner. I was a bit concerned that the layers might have gotten smudged together and would short circuit so I scraped off the surface with a knife and then sealed it up with superglue. Problem solved 😬

Now that the PCB fits, the rest was easy.

4 beautiful 2080 Ti GPUs with waterblocks, at least 2 of which are probably still functional.

I am an experienced builder.

Therefore, I know to put in the IO shield before attaching the motherboard.

Now we’re starting to get somewhere.

Just gotta connect all the waterloop elements now.

Quad terminal that routes water to all the GPUs.

Somewhere along the way I lost one of the screws. I’m not really worried about leaks, but my sense of symmetry is deeply offended.

Water intake for the monoblock.

It feeds from the front radiator.

More tubing.

Even more tubing.

All important RGB splitter to feed into all those monoblocks and LED strips. I’m still one RGB connector short which is unacceptable but can be fixed later.

Oh no. This won’t do. Looks like we’ll have to order and wait for another part.

Fastforward a couple of days and here it is.

So close! (Or are we 🤔)

Time to fill the loop.

Never run your pump dry.

That is, unless you enjoy buying pumps.

Filling the loop with water is the most fun part of the build.

It boots! Time to configure the RGB.

All GPUs come up, even the mutilated ones! Which I totally expected since clearly I know what I’m doing.

Red is not really working out.

Better.

CPU temperature of 67°C at idle.
Well that’s pretty worrying! Or, at least it is if you don’t know that the ASRock Taichi BIOS displays the Tctl temperature (used by fan control) rather than Tdie (actual temperature). And that AMD, in its infinite wisdom, reports Tctl on the 2990WX as Tdie + 27. Which I didn’t. So yeah, time to disassemble everything and check the thermal connection on the monoblock.

Don’t do this.
My patience was failing me at this point and I really didn’t want to drain the whole loop so I decided to just detach all the GPUs as a unit to give me some space to get to the monoblock. Getting all of the PCI slots unlocked took quite a bit of force and then at one point the whole GPU block fell onto the motherboard.

So, I actually did screw up the monoblock. Or rather, didn’t screw it on properly, hence that bad contact.
After reattached the monoblock and despite my best attempts, the motherboard failed to show any signs of life whatsoever. [CENSORED]

So, time to drain to the loop after all.

Keeping plenty of paper towel handy is a good idea. In completely unrelated news, my carpet has received the “biocidal” and “corrosion resistant” buffs and has also acquired the smell of progress. Don’t tell my landlord.
No pics for this part because I wasn’t in the mood, but basically I removed the motherboard + cpu/monoblock and had them checked by Central Computers as soon as I could. They confirmed my suspicion that the motherboard was busted. When I received the news, I had three more days before I was going to leave the country for more than a month during which I had been planning to utilize all those GPUs quite extensively. I had already checked with all the local (and not so local) stores and none of them had a X399 Taichi motherboard in stock. Luckily I found an Amazon seller that could ship me a replacement motherboard within two days.

New motherboard.

Careful now.

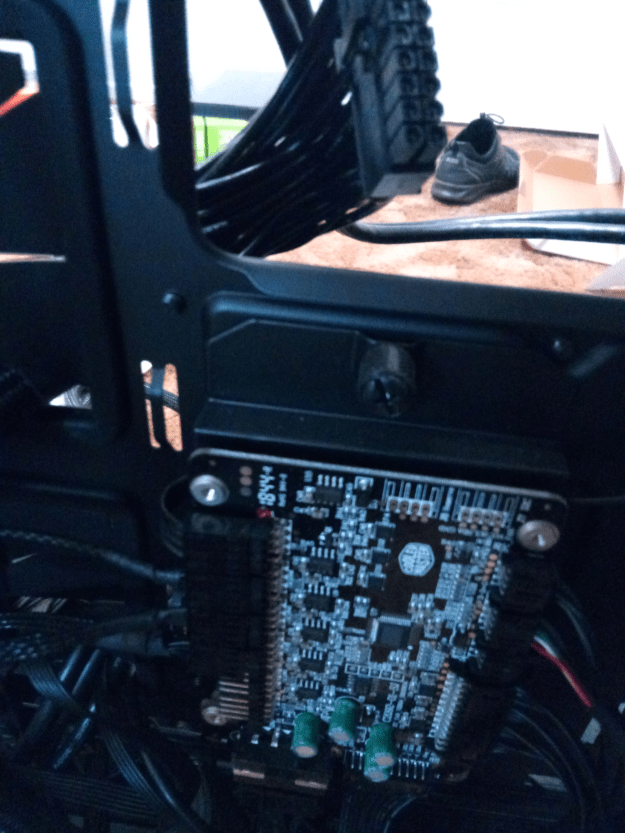
Booting with just the processor and no GPUs.

Temperature is a bit better, but still terrible. This time around I’m pretty sure I didn’t mess it up though. Suspicion intensifies.

This is when I learned about the difference between Tdie and Tctl.

All GPUs still working as well. Woot!

Also, I have sufficiently many RGB splitters now.

GPUs.

Monoblock.

Pump and reservoir.

Everything kept running smoothly during my absence. When I came back one month later, all the color had faded from the loop and I noticed that the small opening on top of the reservoir was not screwed on completely tight. I suspect this caused the dye (and maybe other additives) to evaporate or react with something in the air. I topped it off with some undiluted EK Cryofuel which has kept it’s (faint) color for the next few months. But in hindsight, I should have just replaced all of the liquid which might have averted the disastrous algae bloom that befell the loop last month. Purging this infestation is an ongoing project. Stay tuned for part 3 where you will find out whether I manage to keep my sanity and succeed in restoring the water loop to its former glory 😀
Discussion on Hacker News (2020-05-10, 2 points. 0 comments)
Discussion on r/pcmasterrace (2020-05-10, 0 points, 0 comments)